Home Site Map - Techniques - Plot Infrastructure -
Rain Water System
![]() Guide to collecting large quantities of rain water for yard
irrigation and toilet flushing.
Guide to collecting large quantities of rain water for yard
irrigation and toilet flushing.
I collect rain water from the roof and decks and even from around the foundations. It is then fed to a 7,000 gallon rain water storage tank. A couple of pumps and a pressure tank then turns that into high pressure rain water that is fed to the yard taps for watering plants.
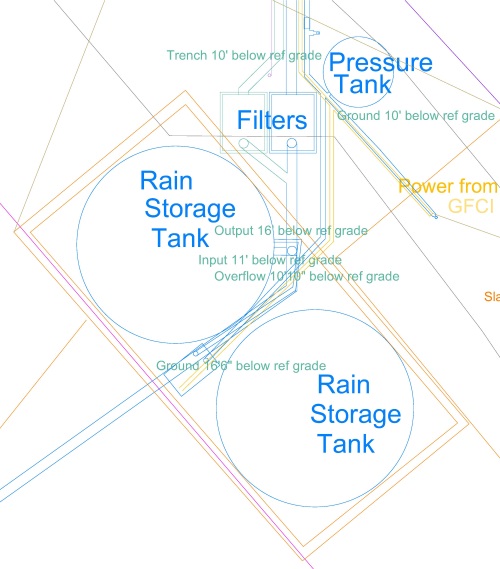
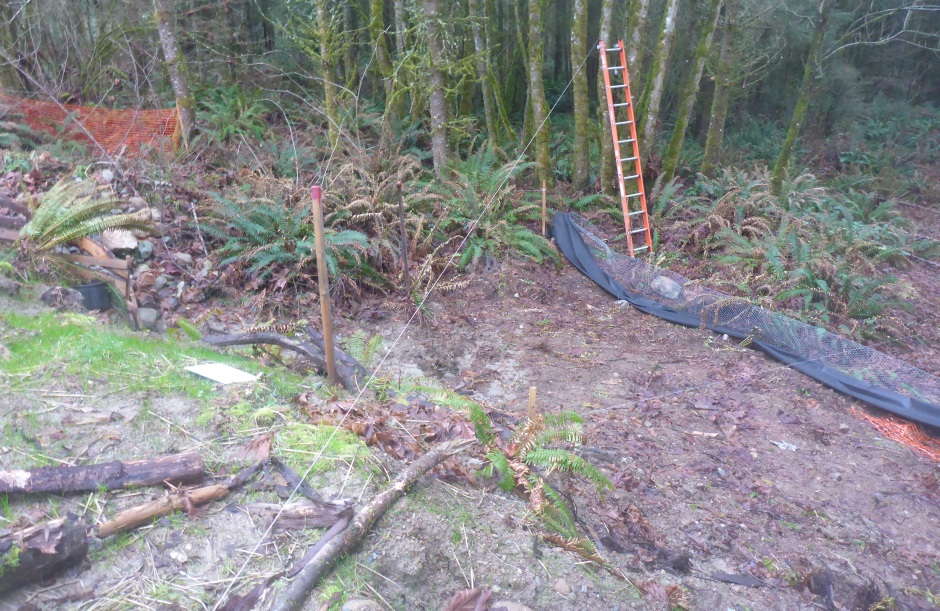
Water storage reservoir tank
AKA Retention pond
As well as storing rain water, the tank also can be regarded as a "retention pond" and as such is part of the drainage plan.
Retention ponds maintain a permanent pool of water throughout the year. They remove pollutants by allowing sediment to settle as water slowly moves from one end of the pond to the other and through biological uptake, as plants absorb excess nutrients. Wet pond water levels can increase dramatically as a result of rainstorms and any excess goes to the dispersal trench.
There is information from King County on how to beautify
retention ponds at...
http://your.kingcounty.gov/dnrp/library/1998/kcr745/intro.pdf
http://your.kingcounty.gov/dnrp/library/1998/kcr745/enhancement.pdf
http://your.kingcounty.gov/dnrp/library/1998/kcr745/casestudies.pdf
http://depts.washington.edu/uwbg/education/King%20County%20Raingarden%20Permit%20discussion%2010%2021%2013-2.pdf
Make your own tank
You can use purchased plastic tanks (details below), but my preferred method is to make your own underground storage tank.
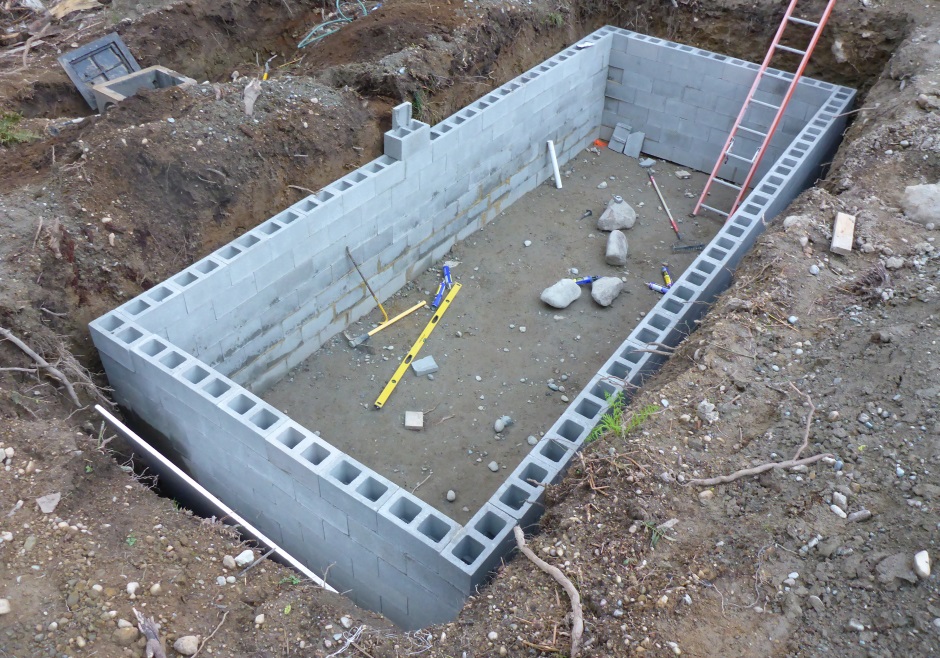
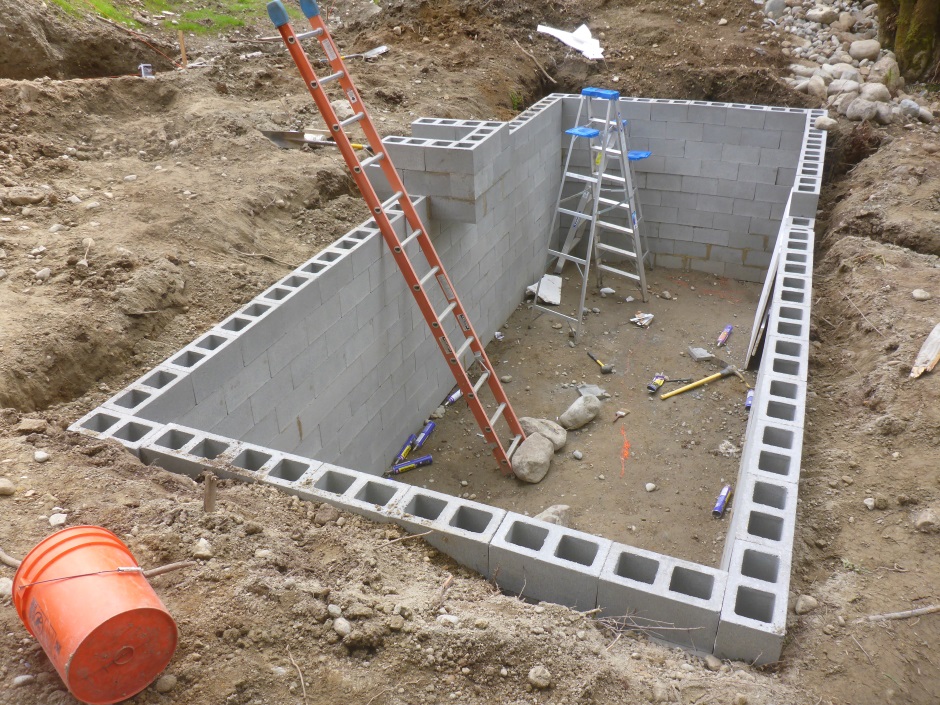
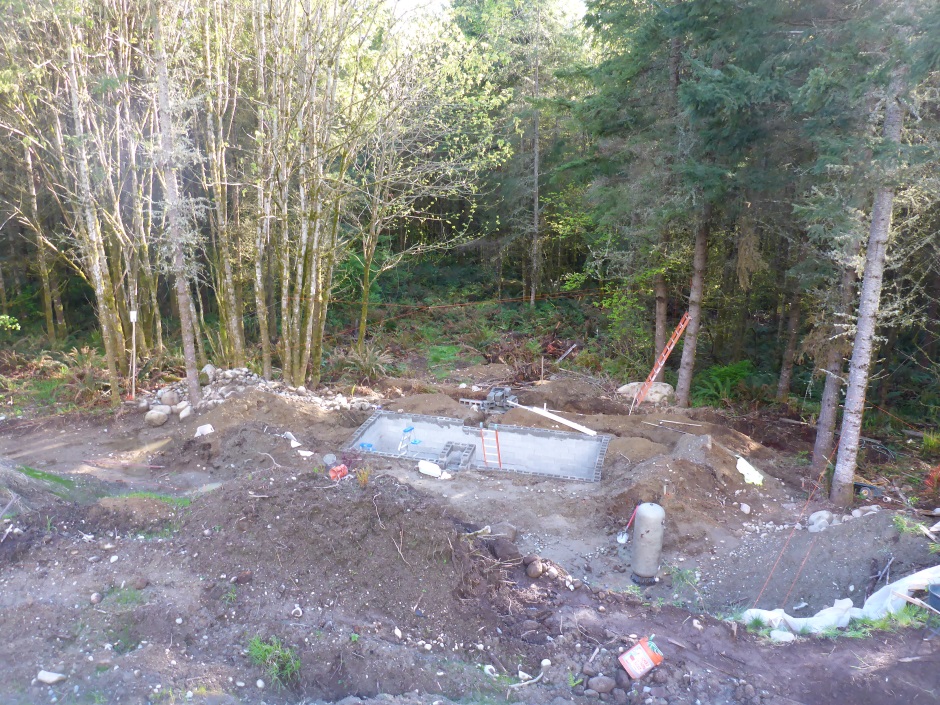
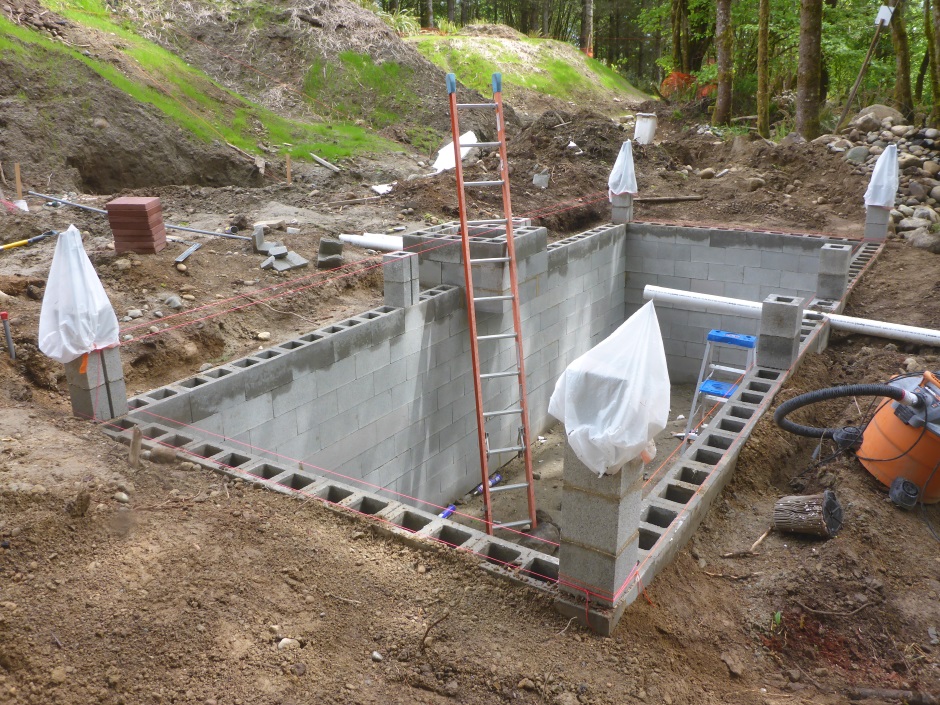
Dig a hole in the ground. I chose to make my hole 22' long x 10' wide x 6.5' deep. With the walls round the outside an a bit of a gap that makes a storage volume of 20' x 8' x 6', which is 960 cubic feet, which is just over 7,000 gallons.
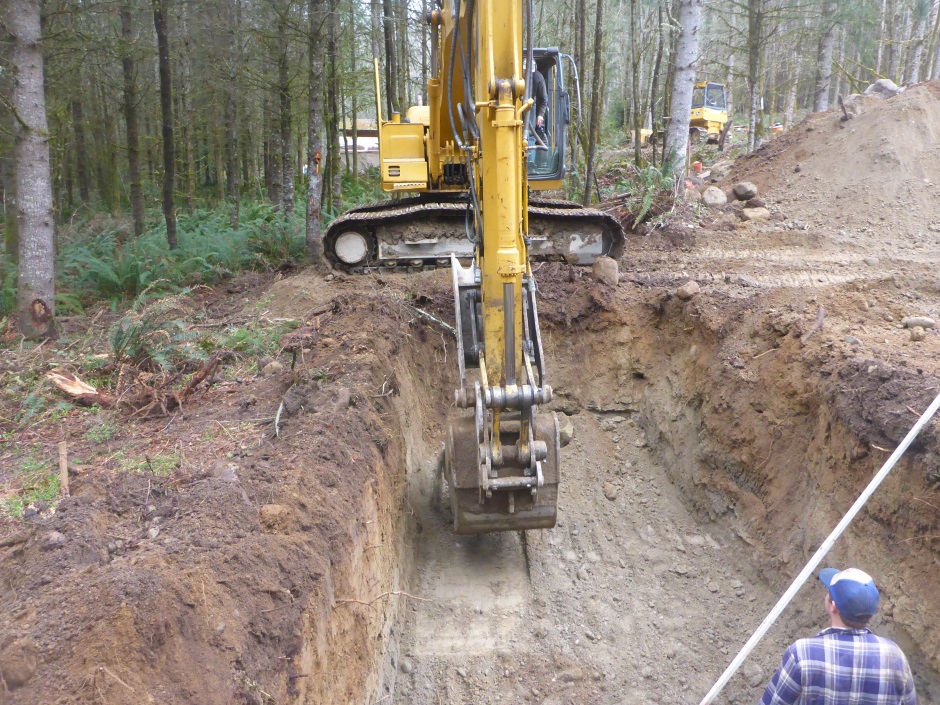
There are plenty of ways to implement an expensive concrete tank in the hole, but the name of the game is trying to achieve the highest volume of storage for the lowest cost. I chose to use low cost concrete blocks (CMUs) from the local HomeDepot store as they are only $1.32 each.
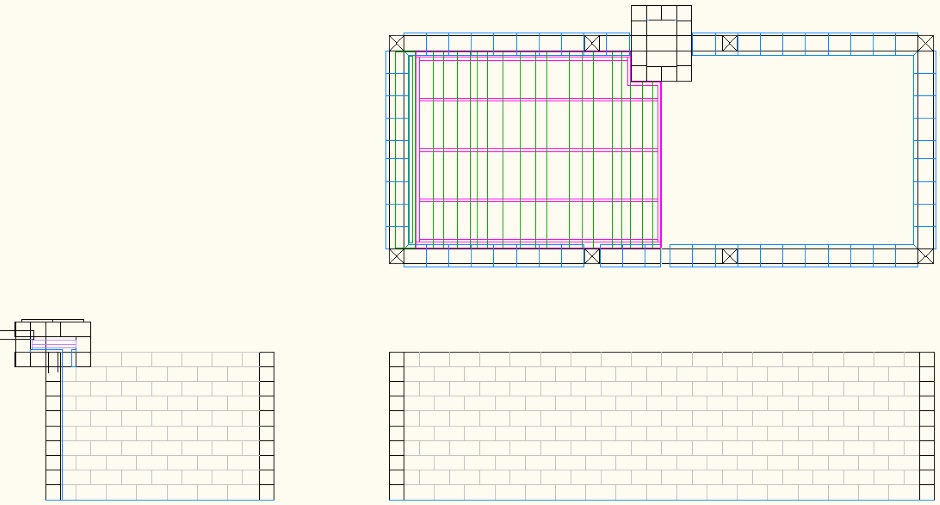
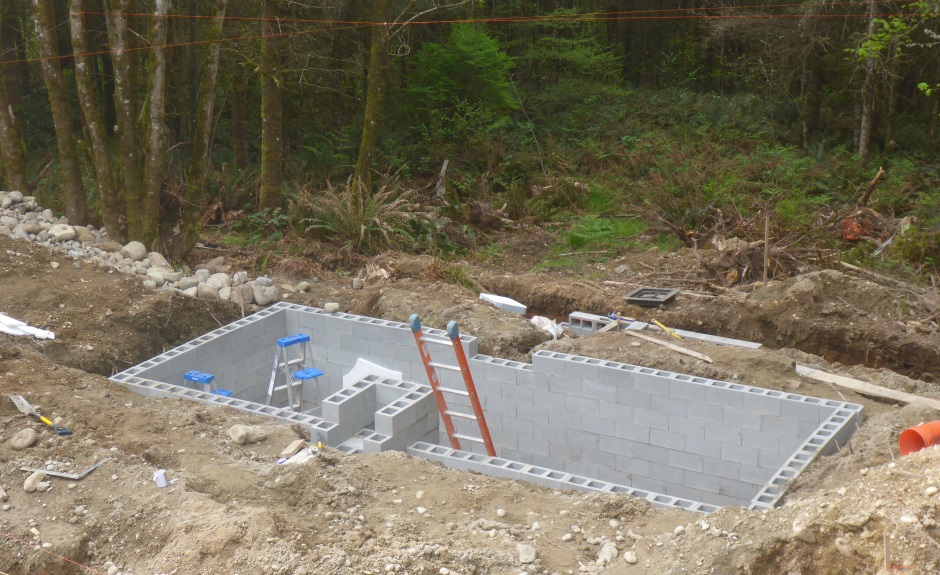
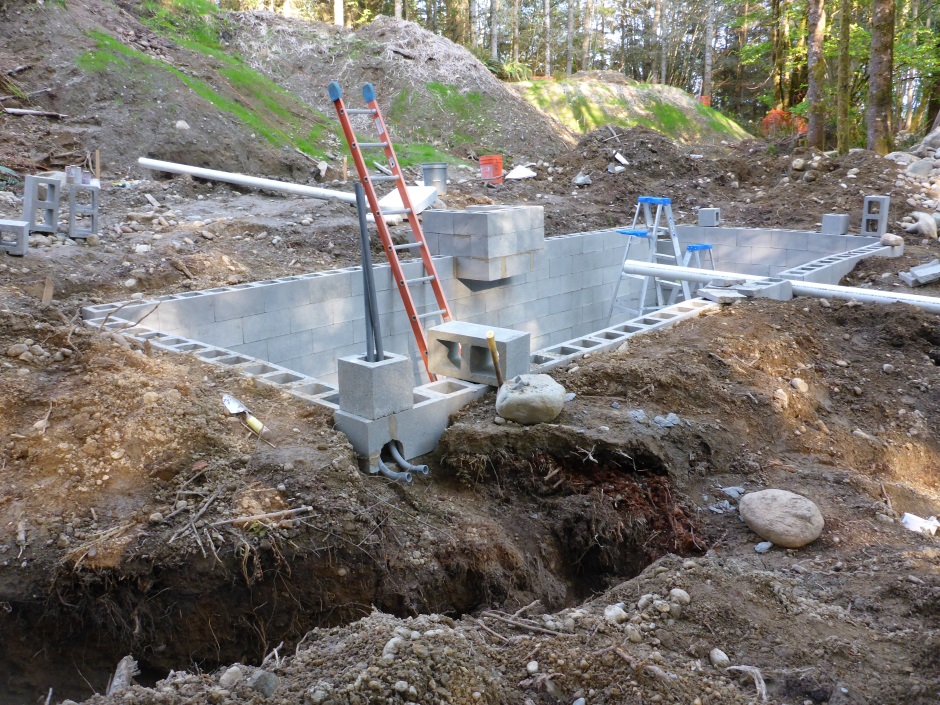
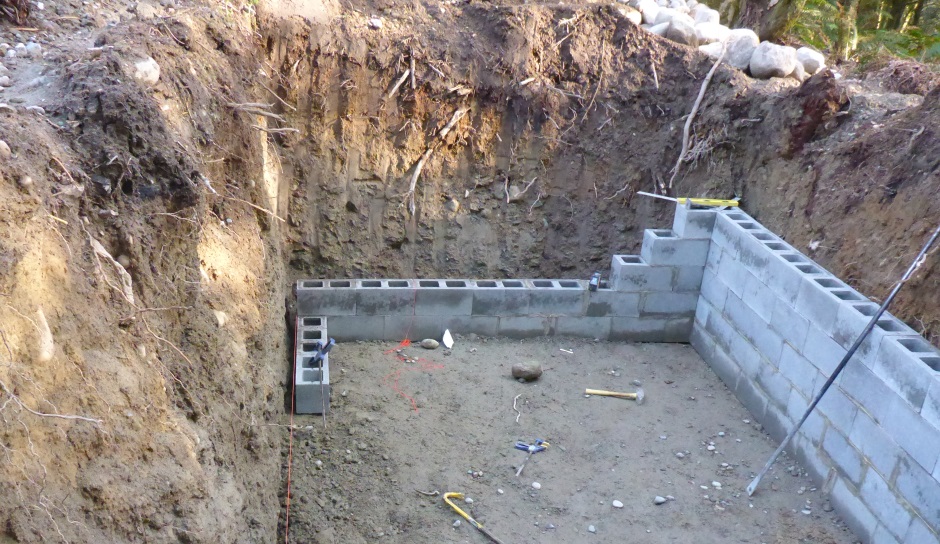
Don't bother to implement a concrete slab because the ground at the bottom of the excavation isn't going anywhere. Build walls round the inside of the excavation by gluing together concrete blocks using PL-Premium construction adhesive . You only need to put a bead of adhesive on the top edges with a couple of blobs between adjacent blocks. Arrange them in a staggered overlap brick configuration. A nice thing about using adhesive is that it comes in a convenient tube rather than you having to mix mortar all the way through the build process.
Depending on the size of tank the walls are likely to be strong enough using just the adhesive. If you want more strength then you can pour in concrete into the cavity of the finished wall and even add some rebar for even more strength.
A negative with using adhesive is that the blocks are somewhat irregular in manufacture and there isn't 3/8" of mortar to take up the variation. They are also slightly tapered so they can be got out of the mould so you need to alternate which way up they are so they glue in a straight line.
With a spade and some manual labor, get the bottom of the excavation level. Use a self leveling laser to accomplish this.
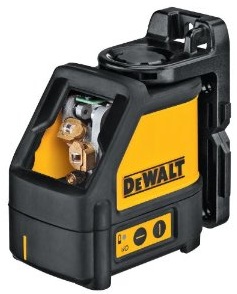 Details here .
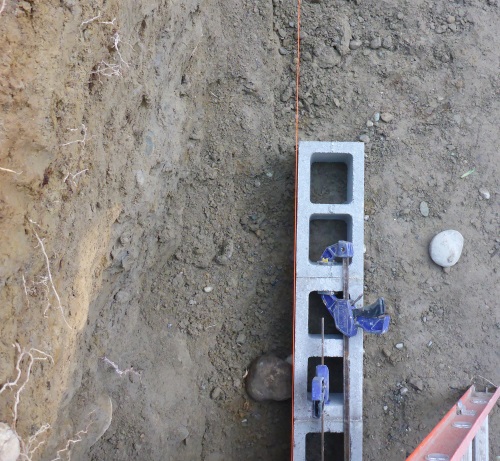
The first row is done by gluing the ends of blocks together (alternating which way up the blocks are to compensate for the taper). Use claps to hold them together as the glue dries. Use a self leveling laser to get them all the same height.
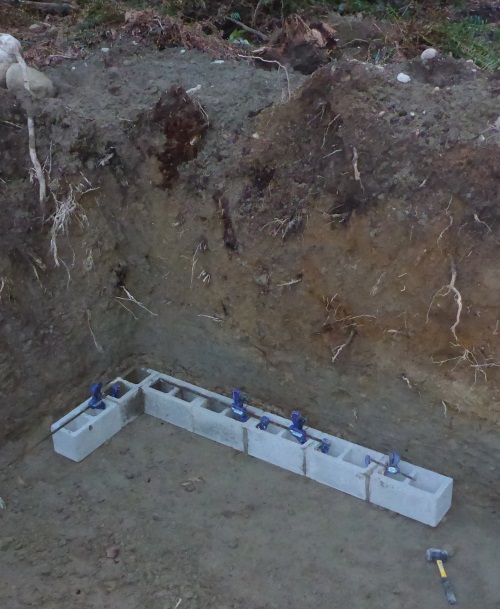
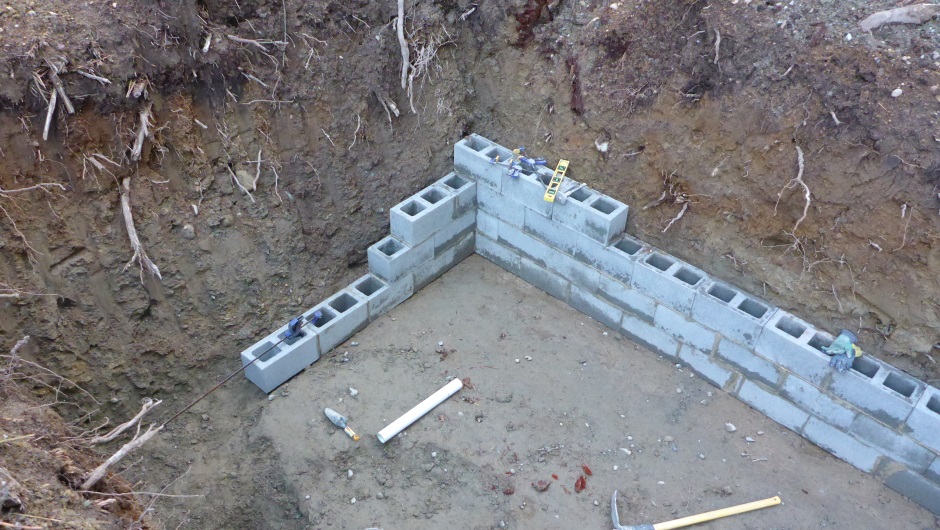
Use a taught string to get the wall straight.
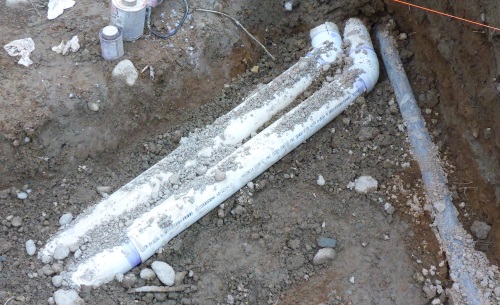
Despite what the following pictures show, it is actually best to build up the wall height fairly evenly so you are able to measure across the diagonals of the rectangle to make sure everything is square.
Waterproofing
The two issues with a plastic membranes are...
1) Avoid it being punctured by anything sharp.
2) Keep UV sunlight off it.
To avoid it being punctured by stones in the ground and by rough concrete you need to line the tank with one inch polystyrene.
To keep the sunlight off the plastic membrane you need another layer of one inch polystyrene on top.
Polystyrene sheet against the wall concrete
6mil Polyethylene sheet
Polystyrene sheet to protect from UV
Getting water from the reservoir tank
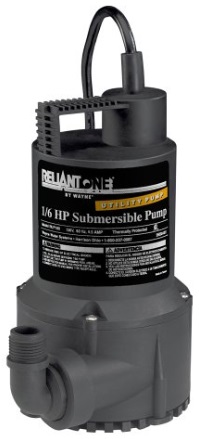
Submersible pump
You want to avoid having a takeoff pipe from the bottom of the reservoir tank because that would be a hole in the waterproof membrane sheet that would likely leak. Also you don't want to have to put the pressure pump at the level of the bottom of the reservoir tank because that would involve having to dig another hole and it would be difficult to maintain as it is so far under ground level. Instead it is best to use a small submersible pump in the reservoir tank on the bottom that can pump the water to a small above ground tank that then goes to the pressure pump. The submersible pump only needs to raise the water about 10 feet (the depth of the reservoir tank plus the depth of the small above ground tank).
Submersible pump float switch
A float switch in bottom of the storage reservoir tank ensures the water level in the storage reservoir tank is high enough for the submersible pump to have something to suck on. It shuts off the submersible pump if the storage tank is not full enough. This stops the submersible pump from being damaged or just wasting electricity. The float switch level should be adjusted so it allows power to go to the submersible pump if the water level is above about 2". It is a "closed when up" switch.
A second float switch is positioned in the top of the buffer tank and is used to turn off the submersible tank when the buffer tank is full. It is a "closed when down" switch.
 Details here..
Above ground storage tank
This tank is filled by the submersible pump. It acts as a buffer before the pressure pump in order to smooth out the various sporadic operation of the various pumps. A sensible size is about 55 gallons./p>
Making high pressure water
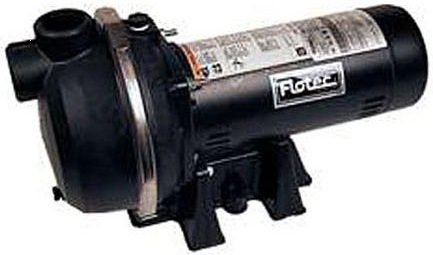
Pressure pump
This is used to pump water from the buffer tank into the pressure tank.
Pressure pump float switches
This ensures the water level in the buffer tank never falls below the height of the outlet pipe (that's near the bottom of the buffer tank). The float switch level should be adjusted so it allows power to go to the pressure switch and pressure pump if the water level is just above the height of the pipe that goes to the pressure pump.
 Details here
.
Pressure Tank
The pump is not used to directly pump water to hose pipe. If that were the case then the pump would need to be on all the time to maintain the water pressure to your yard taps. Instead what happens is that the pump is used to build up water pressure in a pressure tank. When you turn on a yard tap, you are using water pressure from the pressure tank. Only if you leave the tap on for a while will the pressure gradually reduce, which will the trigger the pump to turn back on to build up a reserve of pressure again.
A pressure tank is something like 5 foot high with about a 3 foot diameter. Pressure tanks have strong walls that can withstand at least 100 pounds per square inch (psi) pressure. There is just one pipe into the tank at the bottom that is both the inlet and outlet. Inside the tank is air and the air cannot get out. As you pump water into the pressure tank, the air is compressed. When the pump isn't on and you operate a tap in your yard then the compressed air pushes on the water to drive it to the yard tap. There is a rubber membrane inside the tank that separates the air from the water, but the principle would work even if the membrane were not present.
Typically there is a pressure relief safety valve at the top of the pressure tank, but you really would not want to put it to the test.
The pressure tank I used can be found here.
Pressure Switch
A pressure switch is what provides the mechanism for stopping the pressure pump once the required pressure in the pressure tank has been reached. This switch is the other thing (in addition to the bottom float switch) that determines whether power is sent to the pressure pump to turn it on. Typically a pressure switch is set to turn on the pump when the pressure has dropped to 50 psi and turn it off once the pressure has reached 70 psi. The pressure switch allows you to adjust the figures. If you set only a small range between the min and the max then the pump will come on more frequently (so will wear out sooner). If you set the range too wide then you will have a noticeably variable water pressure. A 20 psi difference is a good compromise. In my case I set an average pressure of 50 psi, ie between 40 and 60 psi.
The pressure switch I used can be found here.
Pressure Gauges
There is no fundamental need to a pressure gauge, but I would highly recommend having one. A pressure gauge allow you to see what going on and allows you to properly adjust your system. Have it close to the pressure switch. It lets you adjust the spring mechanism on your pressure switch to the right on and off pressures.
The pressure gauges I used can be found here.

Mosquito Control
Mosquito life cycle
Female mosquitoes like to lay their eggs in still water in a dark spot. The eggs float on the surface of the water for about 48 hours before hatching into larva. The larva will live in the water for about 10 days eating tiny plants and animals. It then changes into a pupa that floats on the surface of the water for about two days before the adult mosquito emerges.
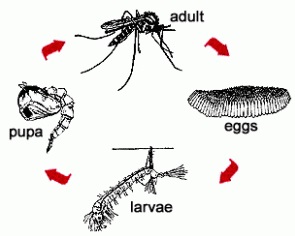
Either you need to make your pond/tank undesirable to female mosquitoes or you need to prevent the larva from developing into pupas.
The length of time for the egg, larvae and pupae stages depend on temperature, so mosquito control is particularly important in the warmer months. A mosquito might go through its life cycle in 14 days at 70 F, but take only 10 days at 80 F.
Fish
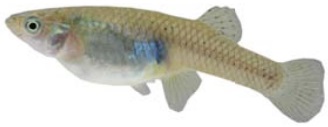
Gambusia affinis, better known as the mosquito-fish, are the best fish to chose for maximum effect. Goldfish, killifish, flat-head minnows, and guppies are other types of fish that are also known to eat mosquito larvae. Larger koi do not eat mosquito larvae.
Mosquito-fish are about an inch long and look similar to a guppy. A large female gambusia is capable of consuming over two hundred mosquito larvae in an hour. They are very aggressive fish and begin attacking the larvae when they are only a couple hours old. Unfortunately, they will also attack dragonfly larvae (which are another predator to mosquito larvae) and will be aggressive toward other fish and tadpoles.
Mosquito-fish are very hardy and capable of adapting to different temperatures and salinity. They live naturally in the southern United States. However, some varieties of mosquito fish have been bred to survive colder temperatures, even down to -30 degrees F. They are livebearers and can produce three to four broods each summer of about twenty-five to one hundred young each. You do not have to worry about them over-populating since they are also very aggressive towards each other. For wastewater ponds, add about 1000 fish per acre.
The white clouds or the black and white stripy zebra danios are also great for a pond. They swim in a school, are attractive and easily munch up all the larvae.
Do not feed the fish as you want them to be hungry for mosquitos.
You may be able to obtain mosquito-fish for free from your local health department or mosquito abatement district.
http://www.liveaquaria.com/product/prod_display.cfm?c=900+1499+1530&pcatid=1530&siteid=21&
Tadpoles
Tadpoles not only eat mosquito larvae, but they grow up to become toads or frogs, which will eat adult mosquitoes. One toad can consume about a hundred mosquitoes a night.
Bats
Some insect eating bats can catch up to 600 bugs in only an hour!
At night, bats come to life and flit through the air, using their sonar-like echo-location to hunt the tiny insects. Bat houses, like bird houses, offer bats a safe place to live. Setting one up in your yard will encourage these flying mammals to take up residence there and help control your mosquito population. Bat houses are wooden structures that look like plain boxes. There is a shallow opening on the bottom where the bats can enter. The small dark boxes imitate bat's natural dwellings, like small caves and hollow trees.
Pond design
The best habitat for mosquito larvae is shallow stagnant water so you want to avoid this. Stagnant water conditions are slow moving or motionless still water with low oxygen levels and high nutrient levels.
Any area of your pond that has shallow or still water will be a breeding ground for mosquitoes. This includes the surface of aquatic plants, water in the top of submerged pots, and shallow water near the edges of the pond. Trim any vegetation that hangs over the edge of the pond that might provide shelter for mosquito larvae. Having paving slabs rather than vegetation round the edge of the pond is a good idea.
Water surface agitation
Making the surface of the water agitated using a fountain or waterfall or air bubbler will make it unattractive to female mosquitos so they don't lay eggs.
Also Mosquito larvae are air breathers with a breathing tube like a snorkel that must break the surface of the water for them to take in air while they stay under water to look for food. If the water’s surface is moving, it becomes difficult for them to breathe and they drown.
Newly hatched mosquitoes must rest on the surface for a few minutes to let their wings dry, because of this their mothers will not lay eggs in water that is constantly moving.
You want high oxygen levels and you can achieve that with aerators, waterfalls, and streams.
You want lots of water movement from pumping systems, skimmers, and bottom drains.
Ideally you need to keep the water flowing at all times. If this is not possible then a few hours a day is better than nothing.
For a fountain you need the highest lift (say 6 feet), for the least power usage (say 25W), for the least money (say $27) so you can afford a few of them.
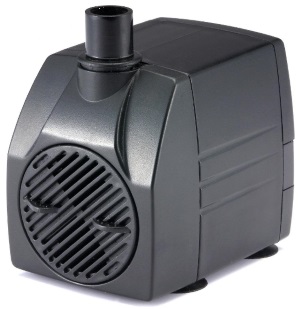 Details here .
Low nutrient levels
You want low nutrient levels and you can achieve this with filtration systems, water treatments, and aquatic plantings.
Bacteria additive
Bti (Bacillus thuringiensis) is a naturally occurring type of bacteria that will kill mosquito larvae and some fly larvae, but is not harmful to fish, pets, wildlife, or humans. It is commonly sold in doughnut shapes under the name "Mosquito Dunks" or "Mosquito Bits."
One dunk treats a 100-foot area for 30 days.
"Mosquito Dunks" are available from home supply stores such Home Depot or Lowes. Mosquito larvae eat algae and small organisms which live in the water. Bacillus thuringiensis israelensis is a bacterium that when eaten by the mosquito larvae induces a fatal dysentery-like disease that kills them. It is highly selective, killing only the larvae of mosquitoes and a few other related flies.
Best strategy
It is best to use a combination of strategies. I opted for a fountain that is often on, a deep tank with paving slabs round the top, and a whole bunch of mosquito-fish.
Yard taps
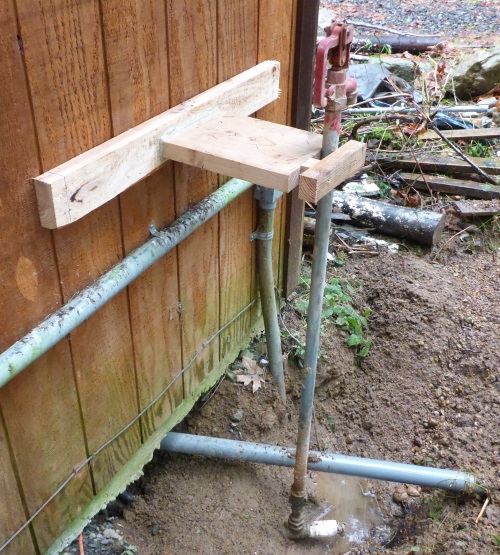
You cannot just use a regular tap because the water in the pipe up to the tap end would freeze. Yard taps have the water control at the bottom of the stem. When you turn the water off, the residual water in the stem runs out into the ground rather than staying in the stem to freeze.
 Details
are here .
Fountains
As well as looking nice, fountains can be used to make the surface of water in a pond rough so that mosquitos do not lay their eggs in it.
It is best to use a 12V DC pump so that you have the option of efficiently running it from solar without having to convert 12V DC from the solar panel to 115V AC.
If you don't initially have a solar panel then you can run the 12VDC pump using a power brick from 115VAC.
The nice thing about solar is that your enjoyment of the fountain is not degraded by thinking about your electricity bill. Solar also means you potentially don't need an on/off switch because the fountain will just run whenever it has power to do so , which of course will be more on sunny days (which is when you want it the most as you will be more in the yard). A negative with solar is that there will be gaps in it running during which mosquitos will be able to lay their eggs.
12VDC submersible fountain pump
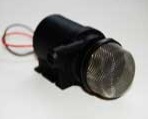
DM412 DM412 $59.95
http://www.discount-pumps.biz/low_voltage_pumps.htm
Voltage
VDC - 12 Nominal
Currant Draw: 0.80 Amps
Power Usage: 9.0
Watts
Maximum Lift: 98 Inches
Flow Rate: 105 gallons/hr @ 5
feet
Weight: 5.6 Ounces
Tubing ID: Inlet 0.0.6250; Outlet
0.4375
Dimensions: 2.800 x 1.700 x 1.700 Inches


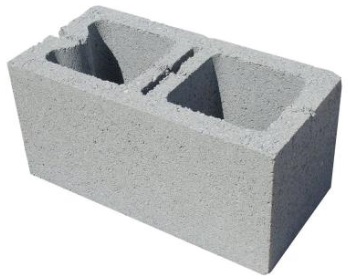 Concrete
block 8x8x16
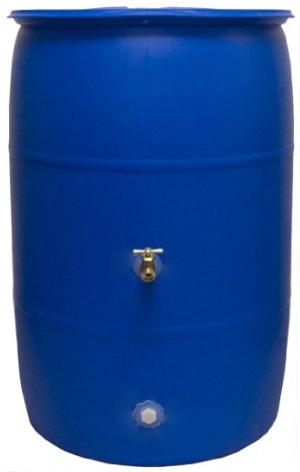
 Pressure pump
