Home Site Map - Techniques - Electrical -
Electrical Feed to Panels
![]() Getting power to the main panel and sub-panels in your house.
Getting power to the main panel and sub-panels in your house.
Getting power to your house
Choose an underground utility connection
Power to your site needs to be installed by the electrical utility company. You can request either an above ground wire from a pole or an underground feed. You should definitely choose the underground feed. Depending on circumstances it may even come out to be about the same price, and it's certainly more robust, less ugly, and less general hassle. With an underground feed the utility company will provide the wiring all the way to the electricity meter (which is not the case with an overhead feed).
Street transformer
The utility company will install a transformer near the edge of the street in a big green box on a concrete pad. These transformers make an annoying humming noise so it is best to try to get the utility company to position it out of ear shot relative to where you typically like to sit in your yard. The job of the transformer of course is to take the high voltage that the utility company uses for distribution and change it down to the 120/240 volts that your house needs.

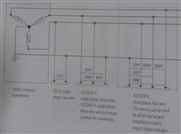
Typically what is delivered to a house is "one phase with two live wires" rather than three phases. This is also known as "single phase, three wire". The two live wires are referred to as L1 and L2. From L1 to neutral is 110-120V, from L2 to neutral is also 110-120V, and from L1 to L2 is 220-240V This diagram explains it...

Electricity meter
From the transformer, wires run underground in conduit (assuming an underground service) to an electricity meter that is typically positioned on the outer wall of your house at a height of about 5 feet (to allow easy reading).

Free standing outside panel assembly
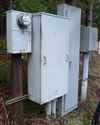
Another option (particularly if your house has not yet been built) is to have a free standing panel arrangement in your yard. This is what I have...

An important consideration is that the electricity meter needs to be physically close to where your main panel is (that has the main breaker). If the meter is on the outside of your garage wall then typically the electrical panel will be on the inside face of that same wall in the same location so that the link between the two is only the wall thickness. If you are mounting your electricity meter free standing outside then that means your electrical panel will also be outside as part of that same arrangement. This is perfectly ok, but in practice it means that you will probably install sub-panels inside your house that are fed from the outside main panel. In my case the main panel feeds two 200 amp sub-panels (that our mounted in the basement) from the 600 amp main panel that is outside.

Main breaker
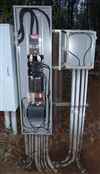
The "Service Entry" wires from the adjacent meter box come into the main panel and the two live wires go directly to the main breaker. In my case it is a 600 amp breaker because I have a 600 amp electrical service from the utility company. Note that each live wire in the picture below is actually 2 wires in order to be able to handle the high current.

Neutral plate/bus
The neutral wire (again actually two wires in parallel to handle the current) is routed to the Neutral plate that (in my case) is in the bottom half of the main electrical panel.

Neutral connects to ground in Main Panel
In the case of a "Main panel", the neutral plate/bus also needs to be connected to earth. This means it needs to connect to big copper stakes that are driven into the ground and it also needs to be connected to the metal enclosure that houses the main electrical panel. In the picture above you can see the wire with green tape round it that goes to the metal case and the bare copper wire that goes to the stakes in the ground. The rest of the connection block is for attaching all the neutral wires for all the feeds that you want from the electrical panel. In the picture above there are only two neutral wires as the main panel is currently only feeding two destinations (two sub-panels).
Breakers
The live connections for feeding off to whatever you want to power are connected via breakers. Out of the bottom of the main breaker come two thick metal bus strips. These are Live1(L1) and Live2(L2). The breakers attach to these live busses. In the case of wanting 110V power then the a single breaker that just attaches to one of the live busses is used. If you want 240V then two breakers ganged together are used (one breaker on L1 and one breaker on L2). Breakers come in different current ratings and different physical sizes. In the picture there are three 240V breakers each capable of 200 amps (that are used for powering sub-panels) and there are a number of smaller breakers that range in current from 20 amps to 100 amps.

My main panel happens to be a GE "A Series Panel". It takes
breaker type "THQB" available from
http://www.galesburgelectric.com/Power-Distribution/ .
A 40A
dual breaker is at
http://www.galesburgelectric.com/GE-THQB2140-40A-Double-Pole-Bolt-in-Circuit-Breaker.html
$55 (For SawMill)
A 60A
dual breaker is at
https://www.galesburgelectric.com/GE-THQB2160-THQL-60A-Double-Pole-120-240V-Circuit-Breaker.html
$55 (For Transfer panel)
A 200A dual breaker is
at
http://www.galesburgelectric.com/GE-TQD22200WL-200A-Double-Pole-TQD-Circuit-Breaker-w-Lugs.html
$158 (For house sub-panel)
Little breakers for the yard
Even though your house power will come from sub-panels, having the smaller breakers (eg 20 amps) in the main panel can be useful for powering various things in your yard.
Thick wire reduces light dimming
The wires from the main panel to the sub-panels in your house need to be good thick wire. The minimum for handling 200 amps is called "2/0" but if you can afford it it's better to use even thicker gauge wire. The reason for using as thick as possible is that you want to minimize the voltage drop that you will get in the wire when everything in your house is turned on. It is really annoying to have your lights dim when someone turns on a hair dryer or an electrical heating appliance. Obviously the thing pulling in the other direction is the fact that thick gauge copper wire is very expensive.
Two sub-panels also reduce light dimming
One of the nice things about the luxury of having two 200 amp sub-panels in the house is that you can use one for your heating appliances and use the other one for your lights and other low current appliances such as assorted electronics. This will avoid the lights varying in brightness.
There is however a slight building code worry about having two
separately fed sub-panels in your house. Building code says
you can only have one service entry feed to a residential house, but
if your main panel is outside in the yard this does not by the letter of the law
contravene this rule because your main power cutoff is the switch in
your yard. It is though a little worrying because two
sub-panels means that the user needs to turn off two switches to cut
all power from the building. If you do use two separately fed
sub-panels then it would be wise to mount them next to each other
and put permanent labels on the switches to make sure it is clear
that there are two switches that need to be turned off. <TODO:17>
Panel brand and types
The sub-panels both need to be rated at 200 amps, but only one of them (the one for the lights and electronics) needs to have a large number of output connections. A good brand of electrical panel (and one that is capable of being used in sub-panel mode) is Siemens.
 Details are here
.
Whatever brand you pick, get one that uses copper bus bars.
The thing that is an even higher factor in picking the brand of panel may well be price of AFCI breakers in go into it given that AFCI is needed on almost all 15 and 20 amp circuits. As it happens, the Siemens AFCI breakers are as low cost as they come (which at $35 each is still expensive).
In my main house the sub-panels are mounted in the basement garage area on the eastern end of the garage north wall.
Sub-panels must have separate earth and neutral
In a sub-panel it is necessary to keep the Neutral and the Earth connections separate. Good panels (such as the Siemens) allow you to separate the neutral bus to make it into two separate busses (one for neutral and one for earth). Only in the Main Panel are the two connected. This means that the wire from the Main Panel to a Sub-panel needs to have 4 conductors: Live1, Live2, Neutral, and Earth. It is ok for the earth wire to not be separately insulated, but the other three need to be individually insulated. When connecting wire to the sub-panel for a 110V circuit (eg a string of power sockets) then you will connect the live to a suitable breaker, the neutral to the neutral bus, and the earth to the earth bus.
Main-Lug sub-panels
If you decide that it is not a required convenience to have a master on/off breaker on your sub-panel, then you can use a "Main-Lug" instead of a full panel. This may be a reasonable choice if you just want to distribute power to a shed. If there is no main breaker then you will rely on the breaker in the main panel to provide the current limiting and to provide a master on/off switch. A good Siemens main-lug that provides 8 spaces for full sized breakers, has copper bus bars, has an included earth bus bar, and can be installed outside is here .


